Player User Guide
Table of Contents
- Overview
- Deployment: Installation and Configuration
- API Documentation
- Getting Started
- Primary Interface
- Other API Resources
Overview
The Player Prototype is a web service application that provides functionality for importing cmi5 course packages, launching assignable units (AU), proxying xAPI requests to an external LRS, doing registration and session management tasks, and various other functionalities necessary to implement the features of the cmi5 specification. The application must be integrated with an external LRS that provides access via an endpoint and a Basic Auth set of credentials. Along with the LRS the player connects to a MySQL RDBMS and stores content files via the local filesystem.
Because the web service API is intended to be integrated with an LMS system it must be configured with an API key and secret via environment variables. It is this API key and secret which is used directly by the LMS to initialize tenants and to request authorization tokens for accessing the data associated with a tenant. The LMS system is expected to track what tenants exist and use the tokens when accessing the course, registration, session and miscellaneous resources.
It is expected that long term production implementations of cmi5 will use the Player Prototype as a guide for how to approach the development of a cmi5 launching system, or for the types of functionalities that should be expected to exist in systems that are being procured to provide such functionality.
The Catapult Content Test Suite is an example of an integration with the Player Prototype. While the CTS targets a different audience (content testers) and is not intended to be used as an LMS would be, it does exercise the full functionality of the Player API and can be used as a reference implementation.
Deployment: Installation and Configuration
In the source code repository along with the Player Prototype web service application code is a set of configuration files enabling easy installation and configuration of the web service via the Docker containerization framework. The preferred installation method for the Player Prototype is via Docker containers built from the Docker image configuration file included in the source code repository. Along with the image file definition, there is a Docker Compose configuration file that makes it easy to create a fully standalone deployment of the Player Prototype already paired with a MySQL database server and populated database. Configuration of the web service occurs via environment variables making it easy to tweak the deployment to suit a variety of environments and installation platforms.
Organizations performing an installation that does not leverage the Docker containerization framework should examine the Docker configuration files for the available configuration values, software version dependencies, and execution steps.
For installations requiring an increased level of security it is recommended that a reverse proxy web server is deployed in front of the Player Prototype web service configured to provide best practices with network-accessible web applications. Additional steps may also be needed for ensuring that the data stored in the database is encrypted, and that content files are secured properly, or other operational requirements satisfying an environment’s additional security and deployment characteristics.
For detailed instructions on building, installing, configuring, and deploying the Player Prototype see the README.md in the player/ directory of the source code repository.
API Documentation
The web service provides automatically generated API documentation via the Swagger Web UI client. To view the web service API documentation, on a deployed instance of the player prototype access the /documentation route in a web browser. For instance when hosting the web service API at the default configured port of 63398 the documentation would be found at http://localhost:63398/documentation.
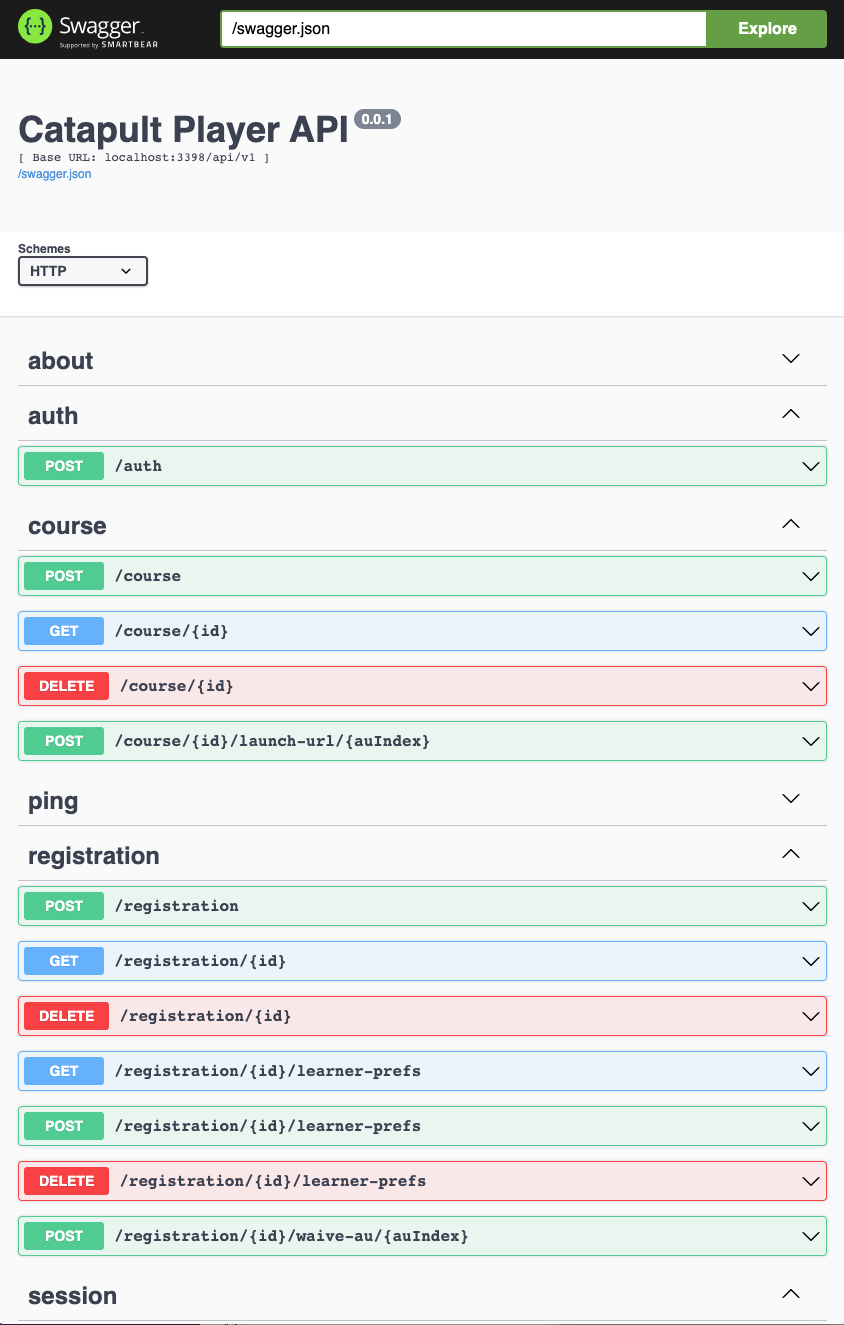
All resources leveraged by the integrating system are contained to the /api/v1 namespace. Additional web service APIs are leveraged internally by the Player Prototype and/or provided to the cmi5 AUs (such as the LRS proxy endpoints, fetch URL, etc.) so do need to be available. An example resource, assuming the same default port on localhost, would be:
http://localhost:63398/api/v1/course
Getting Started
Two Types of Authorization
The web service uses two types of authorization for allowing access to the resources in the API. The resources for managing tenants and retrieving authorization tokens use Basic Authentication, the other resources use Bearer Authentication with a JWT.
For the Basic Authentication resources the credentials are configured at the system level during deployment of the web service via environment variables. The environment variables that need to be set at service initialization are API_KEY and API_SECRET. This authorization scheme is used because of the intentional tight coupling between the LMS and the player as it relates to administrative capabilities where it would be difficult to automate the process and prevents the need for storing passwords in the database, etc.
All other resources are authorized using Bearer tokens that are retrieved from the web service resources as described below in “Retrieving Tenant Access Tokens”. This authorization scheme is used to allow for a more loose coupling between the LMS and the Player and to allow more automated types of processes while still not requiring database storage of passwords. Note that the JWTs used for this purpose are signed based on the secret supplied at the time of service iniialization via the environment variable TOKEN_SECRET. If this value is changed all existing tokens will become invalid and new tokens will need to be issued for each tenant.
Creating Tenants
Resources associated with supporting the cmi5 specification functionalities in the Player Prototype such as course management, registration management, and launch URL retrieval are all tied to a tenant. The tenancy model allows some isolation of records in the database, but more enterprise level tenancy models (such as database per tenant) are outside of the scope of what the Player Prototype is intended to provide.
To create a tenant use a POST request to the /api/v1/tenant resource. The body of the request must be a JSON object that includes a code property whose value is a string that represents a human recognizable value that can be used for debugging purposes. For example, the CTS associates a tenant with each username that it contains, therefore it uses the username as the value of the code property when creating the user’s player tenant.
{
  "code": "tpoc"
}
A successful response from this resource will have a 200 HTTP status code and contain a JSON response body. The response object will contain an id property that represents the identifier for the tenant in the player web service.
{
  "id": 14,
  "code": "tpoc"
}
This identifier value should be tracked by the LMS for use in subsequent requests to the web service resources.
Retrieving Tenant Access Tokens
Once a tenant has been created it is possible to then retrieve tokens associated with the tenant that are used for authorizing access to the tenant specific resources.
To retrieve a tenant specific token the LMS should use a POST request to the /api/v1/auth resource. The body of the request must be a JSON object that includes a tenantId property whose value is the tenant identifier returned from the create tenant resource and an audience property whose value is a string that represents who will be using the token. For example, the CTS tracks a token for each tenant that is created for each user, the audience value used is the prefix cts- along with the username associated with that tenant.
{
  "tenantId": 14,
  "audience": "myLMS-tpoc"
}
A successful response from this resource will have a 200 HTTP status code and contain a JSON response body. The response object will contain a token property that has a string value that is the token that should be used in Bearer authorization headers for the resources that expect such a header. An example response body:
{
  "token": "eyJhbGciOiJIUzI1NiIsInR5cCI6IkpXVCJ9.eyJpc3MiOiJ1cm46Y2F0YXB1bHQ6cGxheWVyIiwiYXVkIjoidXJuOmNhdGFwdWx0OmN0cy1icmlhbiIsInN1YiI6MSwianRpIjoiMDBkZjI2MmItZDc4OC00YzhiLThlYTItYjM0YTRlYmVjMDI3IiwiaWF0IjoxNjI5OTA2MDExfQ.IGyrqA2k1axv20jBsxxaEEuth8ZuyH4c7COuMHWbtCs"
}
Because each token identifies which tenant it is associated with multiple tokens can be issued for authorizing access to the same tenant. The Player Prototype does not track created tokens. The LMS may wish to track the tokens it creates or may pass them directly along to a system that will be communicating directly with the web service.
Primary Interface
Once a tenant specific authorization token has been retrieved it can be used via a Bearer Auth header. An example header looks like the following:
Authorization: Bearer eyJhbGciOiJIUzI1NiIsInR5cCI6IkpXVCJ9.eyJpc3MiOiJ1cm46Y2F0YXB1bHQ6cGxheWVyIiwiYXVkIjoidXJuOmNhdGFwdWx0OmN0cy1icmlhbiIsInN1YiI6MSwianRpIjoiMDBkZjI2MmItZDc4OC00YzhiLThlYTItYjM0YTRlYmVjMDI3IiwiaWF0IjoxNjI5OTA2MDExfQ.IGyrqA2k1axv20jBsxxaEEuth8ZuyH4c7COuMHWbtCs
Course Management
Generally the first step after setting up the tenant is to import cmi5 based course packages. If no content is available the LMS Test Suite package library can be leveraged for testing purposes. See the other available resources in the Catapult repo for example content that more closely mimics real world content that can be used to manually test the LMS integration with the Player.
To import a course package use a POST request to the /api/v1/course resource. The body of the request should be the course package file either as a ZIP package or the raw XML string. The Content-Type header should be specified as either application/zip or text/xml depending on the type of package being imported.
A successful response from this resource will have a 200 HTTP status code and contain a JSON response body. The response object will contain a set of properties about the course and its metadata. The important properties in the response include id, lmsId, metadata and structure. An example response body:
{
  "id": 22,
  "createdAt": "2021-09-03T14:45:20.000Z",
  "updatedAt": "2021-09-03T14:45:20.000Z",
  "tenantId": 4,
  "lmsId": "https://w3id.org/xapi/cmi5/catapult/player/course/f9d22391-075d-4152-91ee-945d9b297cb4",
  "metadata": {
    "aus": [
      {
        "id": "http://course-repository.example.edu/identifiers/courses/02baafcf/aus/4c07",
        "url": "http://course-repository.example.edu/identifiers/courses/02baafcf/aus/4c07/launch.html",
        "type": "au",
        "lmsId": "https://w3id.org/xapi/cmi5/catapult/player/course/f9d22391-075d-4152-91ee-945d9b297cb4/au/0",
        "title": [
          {
            "lang": "en-US",
            "text": "Introduction to Geology"
          }
        ],
        "moveOn": "NotApplicable",
        "auIndex": 0,
        "parents": [],
        "objectives": null,
        "description": [
          {
            "lang": "en-US",
            "text": "This course will introduce you into the basics of geology. This includes subjects such as\n    plate tectonics, geological materials and the history of the Earth."
          }
        ],
        "activityType": null,
        "launchMethod": "AnyWindow",
        "masteryScore": null
      }
    ],
    "version": 1
  },
  "structure": {
    "course": {
      "id": "http://course-repository.example.edu/identifiers/courses/02baafcf",
      "type": "course",
      "lmsId": "https://w3id.org/xapi/cmi5/catapult/player/course/f9d22391-075d-4152-91ee-945d9b297cb4",
      "title": [
        {
          "lang": "en-US",
          "text": "Introduction to Geology"
        }
      ],
      "children": [
        {
          "id": "http://course-repository.example.edu/identifiers/courses/02baafcf/aus/4c07",
          "url": "http://course-repository.example.edu/identifiers/courses/02baafcf/aus/4c07/launch.html",
          "type": "au",
          "lmsId": "https://w3id.org/xapi/cmi5/catapult/player/course/f9d22391-075d-4152-91ee-945d9b297cb4/au/0",
          "title": [
            {
              "lang": "en-US",
              "text": "Introduction to Geology"
            }
          ],
          "moveOn": "NotApplicable",
          "auIndex": 0,
          "parents": [],
          "objectives": null,
          "description": [
            {
              "lang": "en-US",
              "text": "This course will introduce you into the basics of geology. This includes subjects such as\n    plate tectonics, geological materials and the history of the Earth."
            }
          ],
          "activityType": null,
          "launchMethod": "AnyWindow",
          "masteryScore": null
        }
      ],
      "objectives": null,
      "description": [
        {
          "lang": "en-US",
          "text": "This course will introduce you into the basics of geology. This includes subjects such as\n    plate tectonics, geological materials and the history of the Earth."
        }
      ]
    },
    "version": "1.0.0"
  }
}
The id property represents the identifier for the course in the player web service and is used in the other resources of the web service when interacting with a specific course. The LMS should keep track of this identifier and map it to a local data object representing the course if it needs to track more data about the course. While the player provides facilities for managing the courses on an individual basis it does not provide resources for cataloging purposes, such as listing, searching, or tagging. These are functionalities that are expected to be handled by the LMS.
The lmsId is the IRI for each of the course structure nodes as it will be represented within the Player Prototype instance. It is created by adding a UUID to a preset prefix which should make it unique. This identifier will be used in AU launches and as the object for statements that are recorded by the Player Prototype.
The structure property value contains information about the course as it has been parsed from the course structure XML included in the package. The structure object provides the structure in its original hierarchical format and can be used to present the structure of the course as a menu, make decisions about how a learner proceeds through the course, and used to retrieve AU launch URLs, etc.
The metadata property value contains any other information about the course as it is represented in the player. Currently it contains a “flattened” list of the AUs from the course structure in the imported package which can be used when maintaining the hierarchical structure isn’t desired (specifically when targeting just the AUs).
Launching AUs
The Player Prototype itself does not “launch AUs” directly, but instead provides a facility for retrieving a URL which can be used to launch into the AU. It is up to the LMS integrating with the Player Prototype to then provide this URL to the learner depending on the modality of the learner experience (for example, as a browser redirect or as the source for an iframe).
To initiate a new cmi5 session and retrieve a launch URL to access the AU use a POST request to the /api/v1/course/{id}/launch-url/{auIndex} resource. The {id} placeholder in the resource should be replaced with the identifier returned when the course was imported. The {auIndex} placeholder should be replaced with the index of the AU as it is represented in the course structure when imported. The auIndex value for all AUs can be found in both of the structure and metadata structures returned when importing a course and/or when retrieving course details via the GET /api/v1/course/{id} resource. The body of the request must be a JSON object that includes an actor property whose value is an xAPI Agent object identifying the learner that will be interacting with the AU. It is important to note that the xAPI Agent must use an account property IFI per the cmi5 specification. The other properties of the request are optional, but the returnUrl should nearly always be provided per cmi5 best practices. It is also possible to either pre-create registrations or to re-launch existing registrations, in either of those cases the registration identifier should be provided as the value for the reg property. The other properties control various aspects of the session and launch mechanics and should provide for the full range of expected behaviors available in cmi5. An example request body:
{
  "actor": {
    "account": {
      "homePage": "http://myLMSexample.com",
      "name": "tpoc"
    }
  },
  "returnUrl": "http://myLMSexample.com/cmi5/return.html"
}
A successful response from this resource will have a 200 HTTP status code and contain a JSON response body. The response object will contain a set of properties indicating the session identifier for the session that has been created (id), the URL that will launch the learner into the AU (url), and the method the AU expects to be launched with (launchMethod). The id in particular should be tracked by the LMS to allow use of the value in session management related resources available in the web service API. An example response body:
{
"id": 21,
"launchMethod": "AnyWindow",
"url": "http://course-repository.example.edu/identifiers/courses/02baafcf/aus/4c07/launch.html?endpoint=http%3A%2F%2Flocalhost%3A3398%2Flrs&fetch=http%3A%2F%2Flocalhost%3A3398%2Ffetch-url%2F21&actor=%7B%22account%22%3A%7B%22homePage%22%3A%22http%3A%2F%2FmyLMSexample.com%22%2C%22name%22%3A%22tpoc%22%7D%7D&activityId=https%3A%2F%2Fw3id.org%2Fxapi%2Fcmi5%2Fcatapult%2Fplayer%2Fcourse%2Ff9d22391-075d-4152-91ee-945d9b297cb4%2Fau%2F0®istration=220812a3-c29f-4bf2-9e84-f0ef6dd9822f"
}
The launchMethod has two possible values AnyWindow and OwnWindow. Per the cmi5 specification of the returned value is OwnWindow then the AU has indicated that it must be the top level document in a window. This can generally be achieved in a browser based experience by either redirecting the current window to the URL provided or by creating a pop up window with the URL. Special care should be taken in crafting the returnUrl value passed to the resource for the different cases so that the learner has an appropriate experience when exiting the AU.
Other API Resources
Learner Preference Management
The cmi5 specification provides a facility to pass preferences for audio autoplay and a list of language codes to the AU at launch time. While it is possible to directly set these values in the LRS, the Player Prototype provides an interface to manage these preferences without having to provide direct access to the LRS and without having to interact with the LRS directly. Even though these preferences are not restricted to a particular registration at the LRS level, the interface the Player Prototype provides is at the registration level. This means that preferences can only be set for registrations that have already been created, and they will be set for the actor Agent associated with the registration. Note that because the underlying resource in the LRS requires the use of Etags to prevent issues with concurrent updates overwriting each other the same requirements exist for the learner preference resources in the Player Prototype. This means that to set or delete the preferences they will first have to be retrieved and the Etag value will need to be noted.
To retrieve the currently set values (if any) use a GET request to the /api/v1/registration/{id}/learner-prefs resource. The {id} placeholder in the resource should be replaced with the identifier returned when the registration was created either by retrieving the AU launch URL or via the POST /api/v1/registration resource. Note that the identifier used can either by the integer based value recognized by the Player Prototype or the UUID registration code used in xAPI requests. A successful response from this resource will have either a 200 HTTP status code and contain a JSON response body or a 404 HTTP status code when no preferences have been previously set. Because this resource acts like a proxy to the underlying xAPI LRS resource the response body will match the expectations as outlined in the cmi5 specification.
To set or overwrite the preference value use a POST request to the /api/v1/registration/{id}/learner-prefs resource. The {id} placeholder is replaced as described above. A successful response from this resource will have a 204 HTTP status code and no response body. The request body should be a JSON object as described in the cmi5 specification.
To clear the preference value use a DELETE request to the /api/v1/registration/{id}/learner-prefs resource. The {id} placeholder is replaced as described above. A successful response from this resource will have a 204 HTTP status code and no response body.
Waiving AUs
In some circumstances a learner may have satisfied an AU via other means than launching and interacting with the content. In these cases the AU can be waived for a given registration by using a POST request made to the /api/v1/registration/{id}/waive-au/{auIndex} resource. The placeholders for this resource represent the {id} of the registration in either form as described above, and the {auIndex} as described in the section on launching AUs. The body of the request must be a JSON object that includes a reason property whose value is a string that matches the requirements for the reason extension described in the cmi5 specification. An example request body:
{
  "reason": "Administrative"
}
A successful response from this resource will have a 204 HTTP status code and no response body.
Abandoning Sessions
In rare circumstances a cmi5 session may need to be manually abandoned. Sessions are automatically abandoned when an AU in a registration is launched while another session is active which is handled internally by the Player Prototype. But in the case that a session needs to be abandoned a POST request can be made to the /api/v1/session/{id}/abandon resource. The {id} placeholder in the resource should be replaced with the identifier returned when the session was created when retrieving the AU launch URL. Note that the identifier used can either by the integer based value recognized by the Player Prototype or the UUID code used in xAPI requests (such as for the session id extension). Currently no request body is expected. A successful response from this resource will have a 204 HTTP status code and no response body.
Data Management
Additional resources exist for various data management functionalities. Including:
- Retrieving Session details
- Creating Registrations
- Retrieving Registration details
- Deleting Registrations
- Deleting Courses
- Deleting Tenants
See the API documentation for more details regarding these resources.
System Management
Along with the resources used for managing the cmi5 requirements there are two resources made available for general maintenance of the service itself. These provide an interface to:
- Access service details via an “About” resource
- Confirm the service is running via a “Ping” resource
See the API documentation for more details regarding these resources.